And I sincerely thank all you guys out there who have generously posted videos, instructions, and diagrams. This whole thing would have been terribly difficult without those sources of information. There are too many to list.
Floyd Rose, I'm afraid you are not one of these resources. Your new web site was "coming soon" during this whole project. As I write this, it still is.
The first step was to tear Frankie apart. This may sound obvious, but get a small box or something to put all your parts in. Have an old mustard jar or two handy to separate screws and bits if you don't think you'll remember where they came from.

Taking things apart means you should plan ahead to know how to put it back together.
I found a wiring diagram for an Humbucker-SingleCoil-Humbucker with a 5-way switch, and printed it off. After removing the back cover on my Ibanez, it was easy to see the wire colours and connections were a little different. No problem, I just went wire by wire, and noted what was what on the paper I had just printed. And I took pictures for reference later. Lots of pictures.

Only after I had triple-checked my wiring diagram notes, did I apply the soldering gun to the connections. I undid everything (being careful not to melt any wire insulation) based on the switch, leaving wires to the pickups and pots intact.
I made sure I knew which Humbucker was which and also, which way they were positioned. That's important since the 5-way turns off one of the Humbucker coils when in combination with the middle pickup.
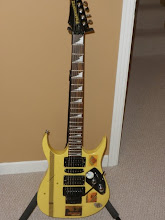
Okey doke, all cleaned out, neck removed, and ready for mods.

No comments:
Post a Comment